Setup before the workshop#
This guide sets up the workshop on your own laptop. If you would rather work in the browser, Aarhus University also provides development environments through Interactive HPC on UCloud; see the UCloud user guide before launching an app.
Complete one route before Day 1. If a check fails and ChatGPT is not providing useful help, email szh@cc.au.dk.
Before the workshop
Complete this page before Day 1. Bring the laptop on which you completed the setup, and keep the workshop folder in a location you can find again.
What you need#
Install Visual Studio Code.
Install the VS Code Python and Jupyter extensions.
Download the workshop as a ZIP file or clone the workshop repository. See Git essentials if you have not used Git before.
Open the top-level
notebooks/folder. The five numbered notebooks are the student exercises.Choose one environment route below.
If you use Git, clone the repository with:
git clone https://github.com/sabszh/cogsci-python-workshop-book.git
cd cogsci-python-workshop-book
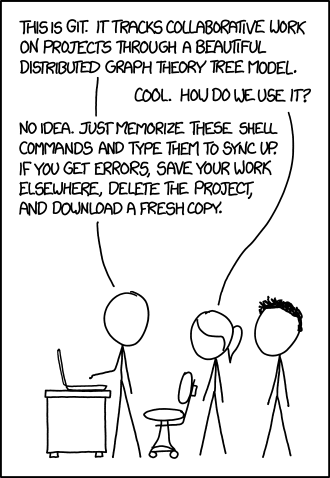
Fig. 2 The commands in Git essentials cover the Git operations used in this workshop. “Git” by Randall Munroe, licensed CC BY-NC 2.5.#
Choose one route
Use either Conda or venv + pip for the workshop. Both create an isolated Python environment. Do not create a venv inside an activated Conda environment, and do not install the same project interchangeably through both approaches.
The Advanced Cognitive Neuroscience course recommends Anaconda. Installing Anaconda Distribution gives you Conda, Python, Navigator, and the scientific package manager used by the course. The workshop commands below work with Anaconda.
What is an environment?#
An environment contains the Python interpreter and packages used by one project. Isolation prevents one course from unexpectedly changing the package versions required by another.
project
├── Python interpreter
├── NumPy
├── pandas
├── Matplotlib
└── other dependencies
Two commands answer two different questions:
python --version       # Which Python version is running?
python -m pip list     # Which packages are available to that Python?
Inside Python, the most reliable check is:
import sys

print(sys.executable)
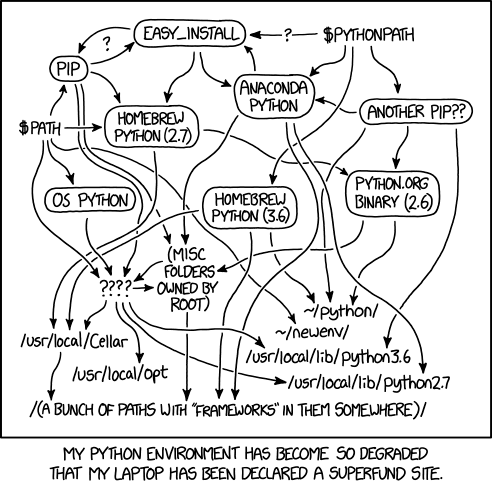
Fig. 3 The reason this chapter insists on one environment at a time. “Python Environment” by Randall Munroe, licensed CC BY-NC 2.5.#
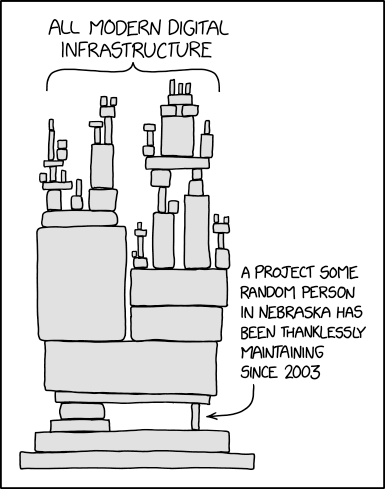
Fig. 4 Package dependencies can become circular too; an environment file records the set that worked together. “Dependency” by Randall Munroe, licensed CC BY-NC 2.5.#
Route A: Conda or Anaconda#
Conda manages both Python versions and packages. Anaconda Distribution, Miniconda, and Miniforge all provide the conda command:
Anaconda includes many data-science packages and a graphical application called Navigator.
Miniconda is a smaller installer from Anaconda.
Miniforge is a smaller community installer configured for
conda-forge.
The ACN course recommends a Conda environment for local MNE work because it includes compiled scientific and 3D dependencies.
1. Install Conda#
Follow the official Conda installation guide. If you already have Anaconda, Miniconda, or Miniforge, you can skip this step.
After installation, close and reopen the terminal. Verify it:
conda --version
Windows users can run the commands in Anaconda Prompt if conda is not recognised in PowerShell.
2. Create the workshop environment#
From the repository root, use the supplied environment file:
conda env create -f workshop-environment.yml
Activate it:
conda activate cogsci-python
The environment name should now appear at the beginning of the terminal prompt.
Alternative: create it manually#
conda create \
  --channel conda-forge \
  --strict-channel-priority \
  --name cogsci-python \
  python=3.12 \
  numpy pandas matplotlib seaborn scikit-learn \
  jupyterlab ipykernel
Then activate it:
conda activate cogsci-python
3. Make it available to Jupyter#
python -m ipykernel install \
  --user \
  --name cogsci-python \
  --display-name "Python (cogsci-python)"
In a notebook, select Python (cogsci-python) as the kernel.
4. Update or recreate it#
Update from the environment file:
conda env update \
  --name cogsci-python \
  --file workshop-environment.yml \
  --prune
Conda environments are disposable. If this one becomes inconsistent, remove and recreate it:
conda deactivate
conda env remove --name cogsci-python
conda env create -f workshop-environment.yml
Route B: built-in venv and pip#
venv is included with Python and creates a lightweight environment inside the project. It is a good default for the workshop and for projects whose dependencies install cleanly with pip.
1. Install Python#
Install a current Python 3 release. Verify it in the terminal:
python --version
On some macOS or Linux systems, the command is python3 instead. If so, substitute python3 when creating the environment.
2. Create .venv#
Open the repository folder in VS Code, open its terminal, and run:
python -m venv .venv
The .venv folder contains the environment. It should not be committed to Git or copied between computers.
3. Activate it#
macOS or Linux:
source .venv/bin/activate
Windows PowerShell:
.venv\Scripts\Activate.ps1
Windows Command Prompt:
.venv\Scripts\activate.bat
The terminal prompt should now begin with (.venv).
4. Install the workshop packages#
python -m pip install --upgrade pip
python -m pip install -r workshop-requirements.txt
Using python -m pip makes it explicit that pip belongs to the currently selected Python interpreter.
5. Leave or recreate the environment#
Leave it with:
deactivate
If the environment becomes inconsistent, delete only the .venv folder and repeat the creation and installation steps. Your scripts and data live outside .venv and are unaffected.
Select the environment in VS Code#
Environment activation in a terminal and interpreter selection in VS Code are related but separate.
Open the Command Palette with Cmd + Shift + P on macOS or Ctrl + Shift + P on Windows/Linux.
Run Python: Select Interpreter.
Select either:
.venv, if you followed Route B; orcogsci-python, if you followed Route A.
Open a new VS Code terminal after changing the interpreter.
The selected interpreter controls running, debugging, completion, and other Python features in VS Code. See the official VS Code environment guide.
For notebooks, also click the kernel name in the upper-right corner and select the matching environment.
If the interpreter or kernel is missing#
First establish whether the environment itself works. Open a new VS Code terminal, activate the environment, and run:
python -c "import sys; print(sys.executable)"
python -m pip show ipykernel
The first command should point into .venv or cogsci-python. If ipykernel is not
found, install and register it from that same activated environment:
python -m pip install ipykernel
python -m ipykernel install \
  --user \
  --name cogsci-python \
  --display-name "Python (cogsci-python)"
Then try these steps in order:
Run Python: Select Interpreter and choose the environment.
In the notebook, choose Select Kernel → Python Environments and select the same path.
Run Developer: Reload Window from the Command Palette.
Open a new notebook cell and compare
sys.executablewith the terminal result.
List the kernels Jupyter can currently see with:
jupyter kernelspec list
If Conda works in Anaconda Prompt but not in VS Code, close VS Code, reopen it after
Conda installation, and create a new terminal. On macOS or Linux, conda init followed
by restarting the shell may be necessary. Avoid installing packages repeatedly until
you have confirmed which interpreter the notebook is using.
Run the diagnostic#
Create check_setup.py:
import sys
from pathlib import Path

import matplotlib
import numpy
import pandas
import sklearn

print("Python environment is ready")
print("Interpreter:", sys.executable)
print("Working directory:", Path.cwd())
print("NumPy:", numpy.__version__)
print("pandas:", pandas.__version__)
print("Matplotlib:", matplotlib.__version__)
print("scikit-learn:", sklearn.__version__)
Run it:
python check_setup.py
The interpreter path should contain either .venv or the Conda environment name cogsci-python.
Packages installed, but imports fail?
The terminal, editor, or notebook is probably using a different interpreter. Compare sys.executable in the failing context, then select the intended interpreter and kernel again.
Optional ACN environment#
The ACN repository uses a dedicated local environment with MNE and 3D visualisation support. Create this separately when the ACN course asks you to:
conda create \
  --channel conda-forge \
  --strict-channel-priority \
  --name mne_acn \
  python=3.12 \
  mne=1.10.0 \
  vtk=9.3 \
  pandas=2.3.1 \
  scikit-learn=1.7.1 \
  ipympl=0.9.7 \
  nibabel=5.3.2
conda activate mne_acn
This is a course-specific environment. Keep the general workshop environment separate so that changing an ACN dependency does not affect other work.