Git essentials#
Git records changes to a project. GitHub stores a remote copy that can be shared and downloaded. For this workshop, the most important distinction is between Git, the version-control program, and GitHub, the website hosting the repository.
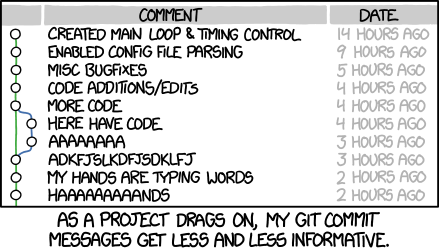
Fig. 10 Commit messages become part of the project’s history, so Complete EEG exercises is more useful than More code. “Git Commit” by Randall Munroe, licensed CC BY-NC 2.5.#
Get the workshop files#
Open a terminal in the directory where you keep projects, then clone the repository:
git clone https://github.com/sabszh/cogsci-python-workshop-book.git
cd cogsci-python-workshop-book
Cloning creates a local folder and connects it to the GitHub repository named
origin. If you do not want to use Git, GitHub also provides Code > Download ZIP.
Extract the ZIP before opening the folder in VS Code.
Check where you are#
Run these commands from the repository folder:
git status
git remote -v
git status shows the current branch and changed files. git remote -v shows the
GitHub address connected to the local copy. These commands only inspect the project.
Get workshop updates#
Before pulling, save your notebook work and check git status. Then run:
git pull
git pull downloads new commits and integrates them into the current branch. If Git
reports that local edits conflict with incoming changes, do not discard the files.
Copy your edited notebook to a safe filename and ask for help resolving the conflict.
Record your own changes#
The following sequence records a snapshot locally:
git status
git add path/to/file.ipynb
git commit -m "Complete EEG exercises"
Use a specific path with git add so you know exactly what enters the commit. A commit
does not automatically upload anything. If you are working in your own GitHub
repository, upload recorded commits with:
git push
A useful VS Code workflow#
Open the repository folder, not an individual file.
Edit and run the notebook or script.
Open Source Control in the left sidebar.
Review each changed file and its diff.
Stage only the files you intend to record.
Write a short commit message describing the change.
Commands used in this workshop#
Command |
Purpose |
|---|---|
|
Create a local copy of a GitHub repository. |
|
Show the branch and changed files. |
|
Show unstaged line-by-line changes. |
|
Retrieve and integrate new commits. |
|
Select a changed file for the next commit. |
|
Record the staged changes locally. |
|
Upload local commits to your remote repository. |
Avoid commands that discard changes until you understand exactly which files they will affect. When in doubt, copy your edited notebook before trying to resolve a Git problem.